Note: This text was created with the help of AI.






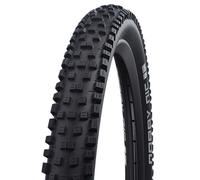
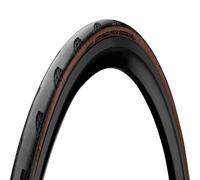
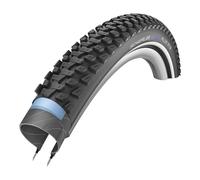


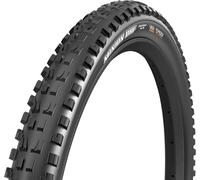










- 1
- 2
- 3
- 4
- 5
- next page
Exciting Offers on Bike Tyres
The size of the tyre depends on the size of the bike. Rims are often designed for a specific tyre size. You will find the size designations on the rims or in the documentation for your bike.
Ask the manufacturer or your local bicycle shop for the correct tyre size. If the tyres do not fit on the rim, they can slip and in the worst case lead to an accident.
Earlier size designations of bicycle tyres were very confusing and complicated. In the meantime, there is a uniform size classification, which is specified by the European Tyre and Rim Standard with the English abbreviation ETRTO (European Tyre and Rim Technical Organisation). In some cases, you need different dimensions for a tire:
- Outer diameter: across the tyre from rim to rim.
- Tyre width: looking at the tyre from above.
- Tyre height: looking sideways at the rim, between the inner edge of the rim and the outer edge of the tyre.
- Nominal diameter of the rim: diameter of the rim shoulder on which the tyre rests.
The ETRTO designation is divided according to a very specific pattern. The first two digits represent the width of the tire, such as 34 millimeters. The next three digits indicate the inner tire diameter, such as 653 millimeters.
- Example: 34-653
Alternatively, there is the designation based on the inch size of the tire. The first number represents the approximate outer diameter of the tire and the second number represents the tire width, both measured in inches.
- Example: 27 x 1.40
In addition to the ETRTO standard, you will also find tyres with an inch designation. For example, a tyre with the designation 26 x 1.40 has an (approximate) outer diameter of 26 inches and a tyre width of 1.40 inches. In addition to this designation with two decimal numbers, you'll also encounter inch designations like "26 x 1 ⅜ x 1 ¼". This says: approximate outside diameter x tire height x tire width.
Another variation also gives the approximate height of the tire around the circumference in inches. The height is then given between the outer diameter and the tyre width.
- Example: 27 x 1 ⅝ x 1 ⅜, given as a fraction or decimal number.
The French standard gives you a combination of tyre outer diameter and a letter for the nominal diameter of the rim, which indicates the height of the tyre. Thus A stands for approx. 30 millimetres, B for approx. 33 millimetres and C for 39 millimetres tyre height.
- Example: 650A results in a rim diameter of 650 millimetres - 30 millimetres - 30 millimetres, as the tyre height is subtracted from the diameter on both sides.
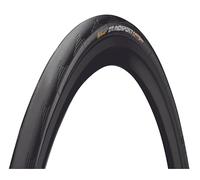
The less tread a tyre has, the easier it is to cycle. Due to the narrow tread of road bike tires, for example, friction is very low and forces are transmitted more directly.
Unlike passenger cars, bicycle tyres do not pose the risk of aquaplaning: due to the narrow contact surface, the punctual pressure on the ground is significantly higher. The bicycle tyre displaces the water better at one point. You would therefore have to be travelling at over 120 kilometres per hour (km/h) on your bike to even come close to aquaplaning.
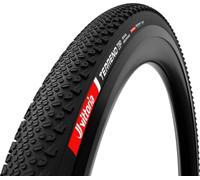
Whether you ride a road bike tyre without tread or an everyday tyre with little tread depth in daily traffic is therefore rather a matter of taste. However, it is true: If you ride a lot on dirty roads or off the beaten track, you should choose tyres with tread.
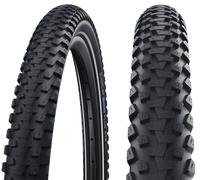
The deeper the tread, the more the tyre digs into the road. The risk of slipping is reduced because sand and stones are more likely to push into the spaces between the tread and the tyre can rest directly on the ground. The knobs of the tread interlock better with the ground. Steering and braking are transmitted well even on loose surfaces. However, driving on slippery roads with a deep tread pattern is more strenuous due to the higher friction.
The shape of the tread plays a very minor role. Whether you opt for a wave tread or crossed grooves is rather secondary in everyday use and only a question of appearance. There are no differences in grip on the road for the normal user. Minimal differences are usually only interesting in professional sports, when milliseconds are at stake on the race track.
It mostly depends on the rubber compound the tires are made of. Manufacturers such as Schwalbe, Michelin or Continental do not like to be looked into the recipe and are constantly working on the best material compounds.
Normally, bicycle tyres with a medium tread are also sufficient for winter. For very icy surfaces, there are also special bicycle tyres with studs or spikes. They grip even on icy surfaces and prevent you from slipping away. However, they are not suitable for normal road traffic, so you should only use these special tyres in icy and snowy conditions.
Road bike tyres, also called "slicks", have no tread but a smooth surface. They have very low friction on the ground and therefore hardly any rolling resistance. They are often highly inflated and run smooth and round. The more tread a tire has, the higher the friction on the ground.
A correctly inflated tyre makes cycling easier and protects rim and tyre on uneven tracks. The air pressure varies from tyre to tyre. However, a bicycle tyre needs considerably more pressure than a car tyre due to its narrow contact surface.
Some road or marathon bike tyres only run smoothly and roundly at eight bars of air pressure. With a high tire pressure, the contact area on the road is reduced because the tire does not flatten. This also means less friction, which makes cycling easier.
In rough terrain, however, a small contact area is more of a disadvantage. With less grip, the risk of slipping increases. Therefore, you should inflate trekking tyres with about four and a half bar.
You need the right tools for fitting a new tyre or inner tube. These tools are often available as a set, so that you have everything you need at hand. You can find a comparison of bicycle tools on pricehunterco.uk. These tools will serve you well when changing your tyres. It is always worth investing in good tools, as you will use them for a long time and they will not wear out quickly.
Below you will find instructions on how to remove the tyre.
- If necessary, unhook the brake of the tyre in question so that the tyre can be removed easily. You may also need to remove the gears, dynamo, rear rack or mudguard before changing the tyre.
- As a tip: Take pictures of the bike parts to be removed before and during the removal. This way you can see how they were originally installed.
- Make sure that you do not damage any cables for the bike's lights.
- Remove the tire by loosening the wheel nuts with a spanner. It may be helpful to use a second open-end wrench to hold them in place in case the bolts slip.
- Loosen the cap nut on the tube valve and unscrew it. Also loosen the nut on the valve tube directly at the rim, so that the tube is loose. This will also let the air out of the tube if it was still inflated.
- Loosen the casing with the help of two casing lifters. You can get them in ready-made repair kits or buy them separately. Start at one point on the tyre and gradually work your way along the tyre.
If you want to repair the inner tube, see the section "How do I repair a bicycle tyre?" for instructions on how to do it. There you will also find the instructions for re-installing the tyre under point 2. If you just want to change the tyre, you can use the new one instead of the old one. In the section "When is it time for new bike tyres?" we explain when you should change the tyre.
If you have ridden into a sharp object and have a flat tire, there is a quick fix for the bicycle tube with the help of a few utensils and the following instructions.
To prepare for this, see "How do I change a bicycle tyre?" on how to remove the inner tube.
Patching the hole:
- Take the tube and screw the valve back on.
- Put it in a water bath and pump it up slightly. The air bubbles will help you find the hole quickly.
- Dry the hose thoroughly.
- Sand the area around the hole with some sandpaper.
- Spread the glue for the patch generously around the area to be patched. The glue should cover more area than the size of the patch. Let the glue dry.
- Remove the metal foil from the patch and press it firmly onto the adhesive. Then remove the plastic film on top and let the glue dry completely.
- Use the water bath to check that the patch has sealed the area.
Installing the repaired hose
- Start with the valve and reinstall it in the reverse order of removal.
- Thread the hose under the cover. Make sure that it does not make any large cross folds, but lies evenly all over.
- Reassemble the cover over the hose. Use the casing lifters and work your way around the tyre piece by piece.
- Inflate the tyre and do a test ride to check that the tyre is working properly again.
As long as there are no missing pieces of rubber and the hole is not visible from the outside, you can continue to ride without having to patch it. However, if this is the case, you should replace it or have it checked by a workshop. If you continue to ride with it, there is a risk that the tyre will tear during the ride.
The wear of bicycle tyres depends on several factors:
- Tire pressure.
- Material compound of the rubber.
- Thickness of the rubber.
- Weight load of bike and rider.
- Behaviour when riding and braking.
- Exposure to weather, especially UV rays.
If you find cracks in the material or discover that the tread is already very worn, it is time for new tyre casings. This also depends on your driving style. Just like driving a car, fast driving, hard braking and fast turns put more strain on the tyres than careful driving. This causes the tyres to wear out more quickly
Depending on the tyres, you should change them after 5,000 to 12,000 kilometres driven. The age of the tyres is also a decisive factor: the rubber contains softening agents that protect it from cracking. Over time, the rubber loses these components and can become porous.
Especially in wet weather or temperatures around freezing point, a worn tyre tread is dangerous. You could slip while driving and injure yourself and others. Therefore, take care to replace the tyres early enough.
Exciting Offers on Bike Tyres
If you're on the lookout for high-quality bike tyres, look no further than the incredible selection available on pricehunter.co.uk. From mountain biking to road racing, there are countless options tailored to your cycling needs. With so much variety, you're sure to find the tyre that fits your bike perfectly while fitting your budget.Types of Bike Tyres
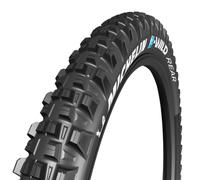
When selecting bike tyres, the type is crucial to match your riding style and terrain. Here’s a breakdown of popular types:- 27.5 x 3.0 MTB tyres - Ideal for rugged trails and off-road conditions.
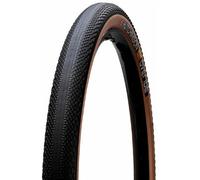
- Road Tyres - Designed for speed and efficiency on paved surfaces.
- Hybrid Tyres - Versatile for both road and light off-road riding.
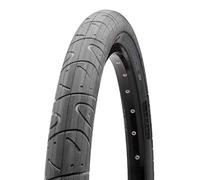
- BMX Tyres - Perfect for tricks and stunts in skate parks.
- Fat Tyres - Excellent for sand and snow, providing extra floatation.
Brands You Can Trust
Choosing the right brand can make a significant difference in performance and durability. Here are some well-regarded brands in the bike tyre market:- Continental Grand Prix 5000 Folding - Known for its excellent grip and longevity.
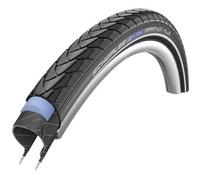
- Schwalbe - Offers a range of tyres designed for various terrains and purposes.
- Maxxis - Renowned for robust mountain bike tyres.
- Michelin - Creates durable tyres with superior handling.
- Specialized - Focuses on performance tyres for competitive cyclists.
Key Features to Consider
Before making a decision, familiarize yourself with the features that matter most in bike tyres:- Tread Design - Impacts traction and control on different surfaces.
- Tyre Width - Wider tyres provide stability, while narrower ones offer speed.
- Weight - Lighter tyres enhance performance but can sacrifice durability.
- Material - Options include rubber compounds for better grip and puncture resistance.
- Tubeless Options - Eliminate pinch flats and enhance performance.
Usage Scenarios
Understanding your riding style is essential for selecting the right tyre. Different scenarios call for different specifications:- Grand Prix 5000 Tubeless - Perfect for long-distance road riding.
- Mountain Bike Trails - Look for tyres with aggressive tread patterns for grip.
- Commuting - Opt for puncture-resistant tyres for daily reliability.
- Racing - Lightweight and aerodynamic tyres are essential for speed.
- Casual Riding - Versatile tyres that handle various conditions comfortably.
Accessories to Enhance Performance
Consider investing in accessories that can improve your tyre's performance and lifespan. These include:- Tyre Sealant - Helps seal punctures instantly.
- Pressure Gauge - Ensures you maintain optimal tyre pressure.
- Tyre Levers - Useful for quick tyre changes on the go.
- Portable Pump - Essential for roadside repairs and maintenance.
- Storage Bags - Keep spare tyres safe and secure for transport.
Note: This text was created with the help of AI.